To open Fax Voip T.38 Console, click Start, point to Fax Voip T.38 Console, and then click Fax Voip Console. Alternatively, you can select the Fax Voip T.38 Console command in the Fax Voip T.38 Console tray menu.
Fax Voip T.38 Console
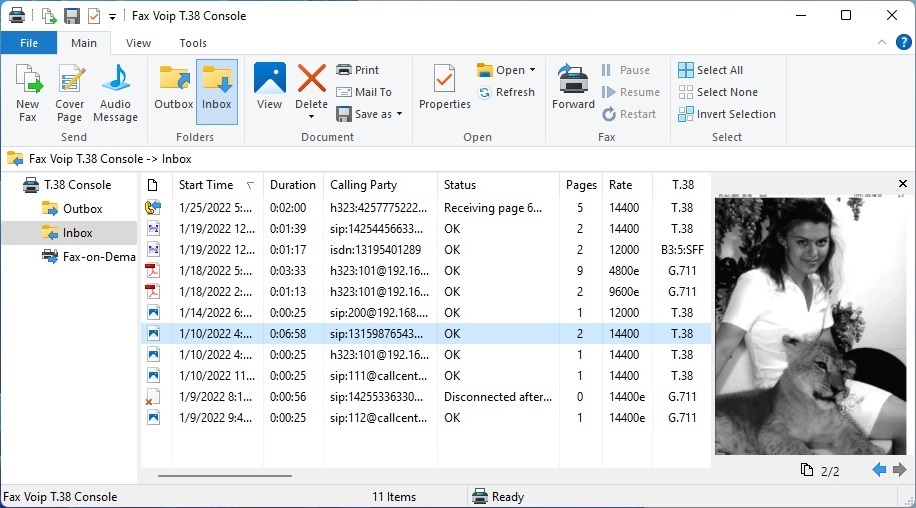
The Fax Voip T.38 Console application allows you to manage all outgoing and incoming faxes and audio messages. In the Fax Voip T.38 Console you can also view a log of incoming calls, for which the Fax on Demand function was applied. You can also scroll up and down to see the chronological sequence of events.
Received or outgoing faxes can be easily viewed in the Preview Panel. Or you can view the fax in the TIFF viewer software, Adobe Acrobat Reader or SFF viewer software by double-clicking on it.
Outgoing audio messages can be easily listen by using the Preview Panel. To open any audio file in the audio player software, double-click on it.
The entries can be sorted on the any available field. To select the sort field, click on the header of the field and an arrow will appear. Click again on the arrow to sort the list in the ascending or descending order.
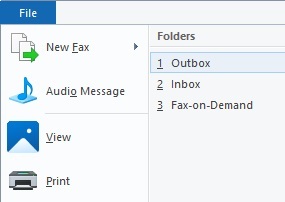
You can choose between 3 folders:
Fax Voip T.38 Console Ribbon Commands
The following commands are available in the Application Menu:
Click to create a new fax to be sent to one or more recipients.
Click to create a new fax to be sent to one or more recipients.
Click to create cover page only fax to be sent to one or more recipients.
Click to create and send test fax page using Fax Voip Virtual Printer.
Click to create audio message to be sent to one or more recipients.
Click to view the selected fax in the TIFF viewer software, Adobe Acrobat Reader or SFF viewer software.
Click to play the selected audio message in the audio player software.
Click to print the selected fax.
Click to send the selected fax or audio message by mail.
Click to save the selected fax or audio message.
Save the selected fax as TIFF file. TIFF files are commonly used for FAX transmission.
Save the selected fax as PDF file. PDF format is useful to storage your documents and send them via e-mail.
Save the selected fax as SFF file. SFF (Structured Fax File format) is used by ISDN devices that support CAPI.
Save the selected fax as PNG file. Use it on your computer or on the web.
Save the selected fax as JPEG file. Use it on your computer, in email, or on the web.
Save the selected fax as BMP file. Use high quality bitmap images on your computer.
Save the selected fax as GIF file. Use it in email or on the web.
Open the Save As dialog box to select from all possible file types.
Click to delete the selected entries.
Click to delete the selected entries.
Click to delete all entries in the currently visible folder.
Click to delete faxes and audio messages associated with the selected entries. Note that this command does not remove the entries.
Click to delete all faxes and audio messages in the currently visible folder. Note that this command does not remove the entries.
Click to forward the selected outgoing or received fax. Selecting this option opens the Fax Voip T.38 Console Send Fax Wizard window, where you can enter a fax number. (See also in the Send a Fax with Fax Voip Printer chapter of this user manual).
Click to pause a fax transmission.
Click to resume a fax transmission.
Click to re-send the selected outgoing fax in the case of failed transmission.
Click to forward the selected audio message. Selecting this option opens the Fax Voip T.38 Console Send Audio Message Wizard window, where you can enter a phone number. (See also in the Sending Audio Messages from Fax Voip T.38 Console chapter of this user manual).
Click to pause an audio message transmission.
Click to resume an audio message transmission.
Click to re-send the selected outgoing audio message in the case of failed transmission.
Click to view properties of the selected fax or audio message.
Click to open Help file. To display the application help system you also can use Help Button, which is placed in the upper right corner of the Ribbon.
Click to open Help file. To display the application help system you also can use Help Button, which is placed in the upper right corner of the Ribbon.
Display program information, version number and copyright.
Click to quit the Fax Voip T.38 Console.
Click to display the Outbox folder.
Click to display the Inbox folder.
Click to display the Fax-on-Demand folder.
The following commands are available in the Main tab:


Click to create a new fax to be sent to one or more recipients.
Click to create cover page only fax to be sent to one or more recipients.
Click to create audio message to be sent to one or more recipients.
Click to display the Outbox folder.
Click to display the Inbox folder.
Click to view the selected fax in the TIFF viewer software, Adobe Acrobat Reader or SFF viewer software.
Click to play the selected audio message in the audio player software.
Click to delete the selected entries.
Click to delete the selected entries.
Click to delete all entries in the currently visible folder.
Click to delete faxes and audio messages associated with the selected entries. Note that this command does not remove the entries.
Click to delete all faxes and audio messages in the currently visible folder. Note that this command does not remove the entries.
Click to print the selected fax.
Click to send the selected fax or audio message by mail.
Click to save the selected fax or audio message.
Save the selected fax as TIFF file. TIFF files are commonly used for FAX transmission.
Save the selected fax as PDF file. PDF format is useful to storage your documents and send them via e-mail.
Save the selected fax as SFF file. SFF (Structured Fax File format) is used by ISDN devices that support CAPI.
Save the selected fax as PNG file. Use it on your computer or on the web.
Save the selected fax as JPEG file. Use it on your computer, in email, or on the web.
Save the selected fax as BMP file. Use high quality bitmap images on your computer.
Save the selected fax as GIF file. Use it in email or on the web.
Open the Save As dialog box to select from all possible file types.
Click to view properties of the selected fax or audio message.
Click to open the currently visible folder in Windows Explorer.
Click to open the currently visible folder in Windows Explorer.
Click to refresh the contents of the currently visible folder.
Click to forward the selected outgoing or received fax. Selecting this option opens the Fax Voip T.38 Console Send Fax Wizard window, where you can enter a fax number. (See also in the Send a Fax with Fax Voip Printer chapter of this user manual).
Click to pause a fax transmission.
Click to resume a fax transmission.
Click to re-send the selected outgoing fax in the case of failed transmission.
Click to forward the selected audio message. Selecting this option opens the Fax Voip T.38 Console Send Audio Message Wizard window, where you can enter a phone number. (See also in the Sending Audio Messages from Fax Voip T.38 Console chapter of this user manual).
Click to pause an audio message transmission.
Click to resume an audio message transmission.
Click to re-send the selected outgoing audio message in the case of failed transmission.
Click to select all the entries in the list.
Click to unselect all the entries in the list.
Click to invert the selected entries in the list.
Most of the commands placed on the Main tab are also available from the context menu of the folder and from the Application Menu.
The following commands are available in the View tab:

Click to show or hide the Preview Pane.
Click to show or hide the Folder Bar.
Click to show or hide the statusbar.
Uncheck this option to hide the Ribbon. After your confirmation the Fax Voip T.38 Console will be switched to Classic Toolbar mode. Restarting the application is required.
Flag this option to show the classic Toolbar. After your confirmation the Fax Voip T.38 Console will be switched to Classic Toolbar mode. Restarting the application is required.
Flag this option to show the classic Menu Bar. After your confirmation the Fax Voip T.38 Console will be switched to Classic Toolbar mode. Restarting the application is required.
Click to Add/Remove the columns to display and set their order. See also in the Configure Fax Voip T.38 Console views chapter of this manual.
This option allows you to choose the Visual Style of the Folder Bar in accordance with Visual Themes provided by the operating system. Simply choose the desired theme from the Drop-Down Gallery.
Click to show the standard Color dialog where you can choose the background color of the Preview Pane. You can also show this dialog by clicking the right mouse button on the top or bottom part of the Preview Pane.
Click to use default background color of the Preview Pane.
Click to show the standard Color dialog where you can choose the background color of the Preview Pane. You can also show this dialog by clicking the right mouse button on the top or bottom part of the Preview Pane.
Select this option to use the default Ribbon theme specified by the operating system.
Select this option to customize Ribbon colors. Please note that this option does not work correctly in Windows 11, Windows 10 version 1809 or later, Windows Server 2022 and in Windows Server 2019.
Select the global background color for a customized ribbon.
Select the global highlight color for a customized ribbon (Windows 7 only).
Select the global text color for a customized ribbon.
Use this option to restore the default view of the Fax Voip T.38 Console.
Most of the commands placed on the View tab are also available from the Folder Bar context menu.
The following commands are available in the Tools tab:

Click to show Fax Voip Virtual Printer properties.
Click to create and send test fax page using Fax Voip Virtual Printer.
Click to open Contacts folder.
Allows you to add a new contact card to your Contacts.
Click to find people in your Contacts.
Opens Address Book (Windows Contacts).
Click to open Fax Voip T.38 Console Control Panel.
Click to run Fax Voip T.38 Console Backup or Restore Wizard. Fax Voip T.38 Console Backup or Restore Wizard is used to save, restore or move your configuration and files to other computer. To use this option, administrator privileges are required.
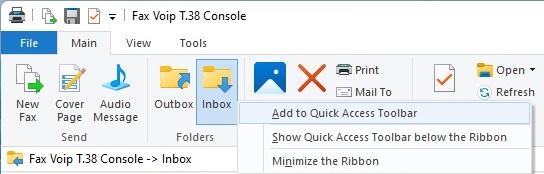
The Quick Access Toolbar (QAT) is a small, customizable toolbar that exposes a set of Commands that are specified by the application or selected by the user.
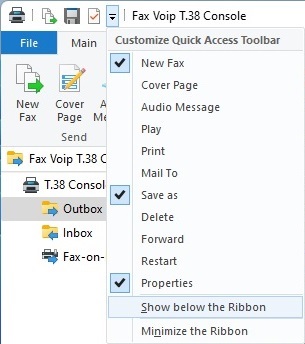
By default, the Quick Access Toolbar (QAT) is located in the title bar of the Fax Voip T.38 Console window but can be configured to display below the ribbon. In addition to exposing Commands, the Quick Access Toolbar (QAT) also includes a customizable drop-down menu that contains the complete set of default Quick Access Toolbar (QAT) Commands (whether hidden or displayed in the Quick Access Toolbar (QAT)) and a set of Quick Access Toolbar (QAT) and ribbon options. Almost all ribbon controls can be added to the Quick Access Toolbar (QAT) through the context menu shown in the following screen shot.