1. Open Fax Voip T.38 Console Control Panel.
2. Click E-mail in TreeView, then click Mail to Fax/Audio, then click Customization.

3. To create new rule click New. To edit an existing rule select it and click Edit (or double-click the selected rule).
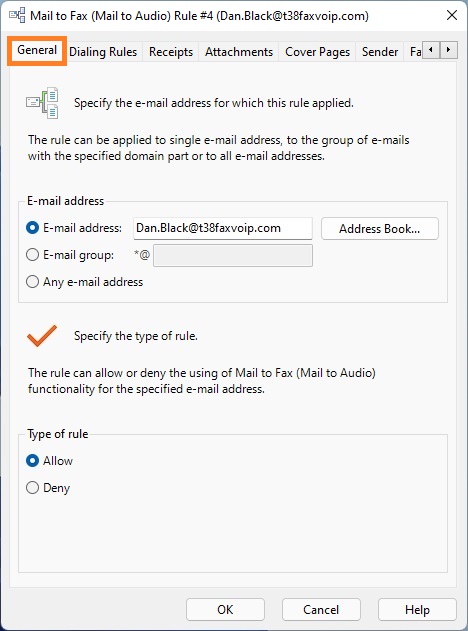
4. In the Mail to Fax (Mail to Audio) Rule window in the General panel, specify the e-mail address for which this rule applies. To select e-mail address from Address Book (Windows Contacts), click the Address Book button. Select the type of rule: Allow or Deny. More details can be found in the chapter Mail to Fax (Mail to Audio) Rules Settings, General Settings section.
5. Switch to the Dialing Rules panel.
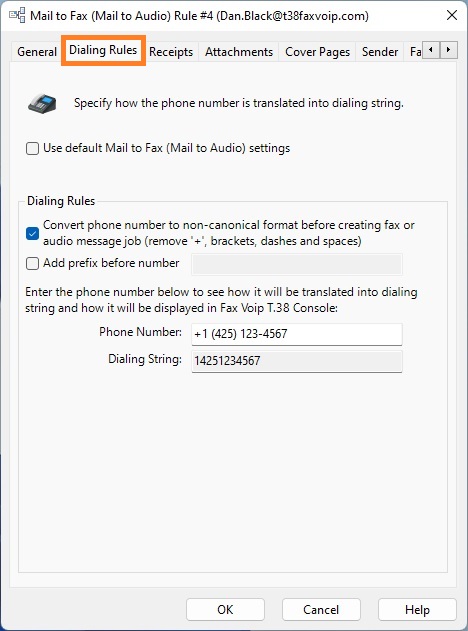
6. In the Dialing Rules panel, specify whether to use default or custom settings for dialing rules. Specify whether to convert phone number to non-canonical format before creating fax or audio message job. Specify whether to add prefix before number. More details can be found in the chapter Mail to Fax (Mail to Audio) Rules Settings, Dialing Rules Settings section.
7. Switch to the Receipts panel.
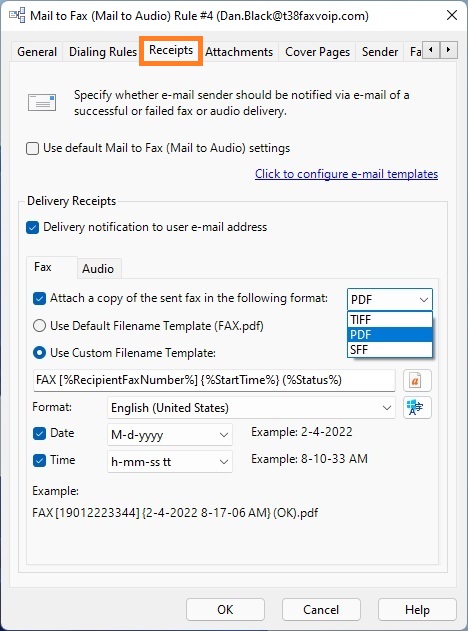
8. In the Receipts panel, specify whether to use default or custom settings for fax or audio message delivery notifications. Specify whether e-mail sender should be notified via e-mail of a successful or failed fax or audio message delivery. Select format for the attached faxes, TIFF, PDF or SFF. Specify how file names are generated. More details can be found in the chapter Mail to Fax (Mail to Audio) Rules Settings, Receipts Settings section.
9. Switch to the Attachments panel.
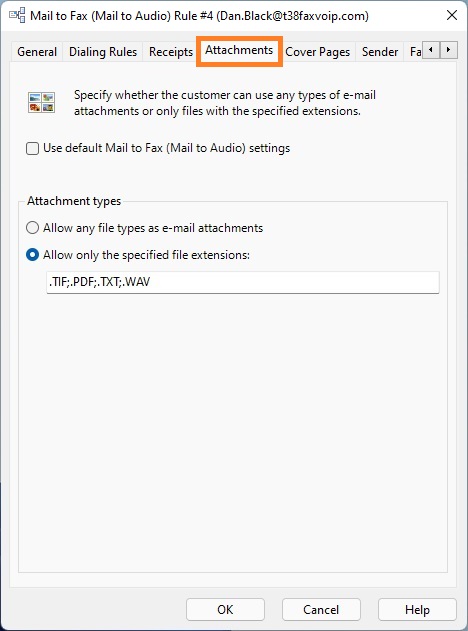
10. In the Attachments panel, specify whether to use default or custom settings for e-mail attachments. Specify whether the customer can use any types of e-mail attachments or only files with the specified extensions. More details can be found in the chapter Mail to Fax (Mail to Audio) Rules Settings, Attachments Settings section.
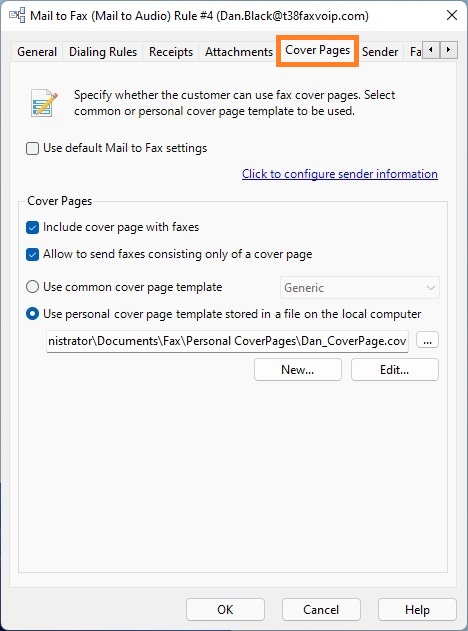
11. Switch to the Cover Pages panel.
12. In the Cover Pages panel, specify whether to use default or custom settings for fax cover pages. Specify whether the customer can use cover pages. Select common or personal cover page template to be used. More details can be found in the chapter Mail to Fax (Mail to Audio) Rules Settings, Cover Pages Settings section.
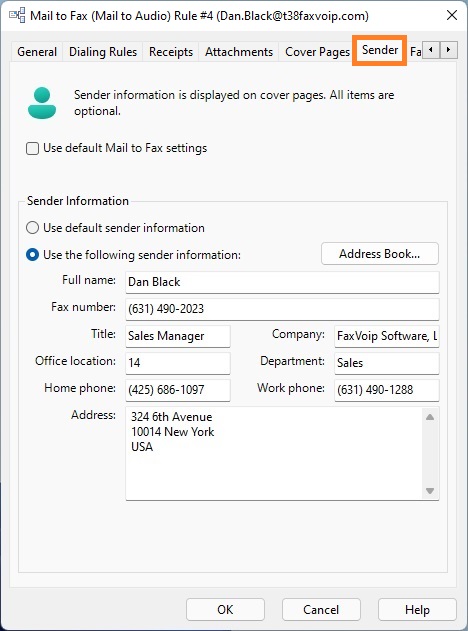
13. Switch to the Sender panel.
14. In the Sender panel, specify whether to use default or custom settings for sender information. Enter information about the fax sender. To import sender information for the specified e-mail address from Address Book (Windows Contacts), click the Address Book button. More details can be found in the chapter Mail to Fax (Mail to Audio) Rules Settings, Sender Information Settings section.
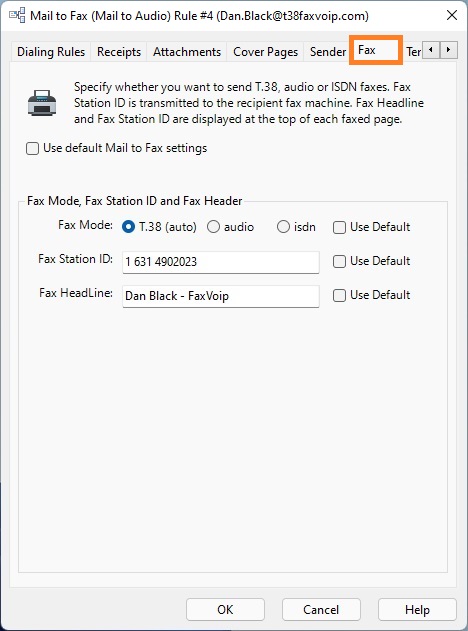
15. Switch to the Fax panel.
16. In the Fax panel, specify whether to use default or custom settings for fax options. Specify the Fax Mode, Fax Station ID and Fax Headline to be used. More details can be found in the chapter Mail to Fax (Mail to Audio) Rules Settings, Fax Settings section.
17. Switch to the Templates panel.
18. In the Templates panel, specify whether to use default or custom settings for e-mail templates. Configure e-mail templates to be used with the rule. More details can be found in the chapter Mail to Fax (Mail to Audio) Rules Settings, E-mail Templates Settings section.
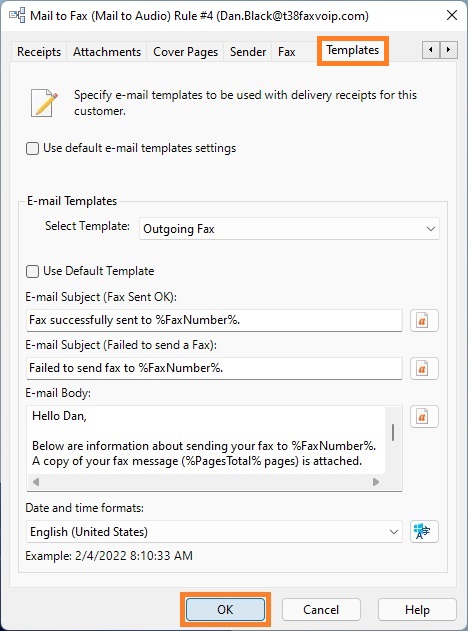
19. Click <OK> button to fix changes.
20. To change the preference order for Mail to Fax (Mail to Audio) rules use Move Up and Move Down commands. One of the entries should be selected.
21. Click <Apply> button to save modified settings for Mail to Fax (Mail to Audio) rules. Do not forget to restart Fax Voip T.38 Console to operate with new settings. To do this click <STOP> button, then click <START> button.