This chapter shows you how to quickly configure the Fax Voip FSP to operate with SIP service provider on the example of callcentric.com provider which supports both T.38 and audio faxes. More examples can be found in the Configure Fax Voip FSP with VoIP Service Providers chapter of this user manual.
To configure Fax Voip FSP follow these steps:
1. In the Fax Voip FSP Control Panel click VOIP in TreeView.
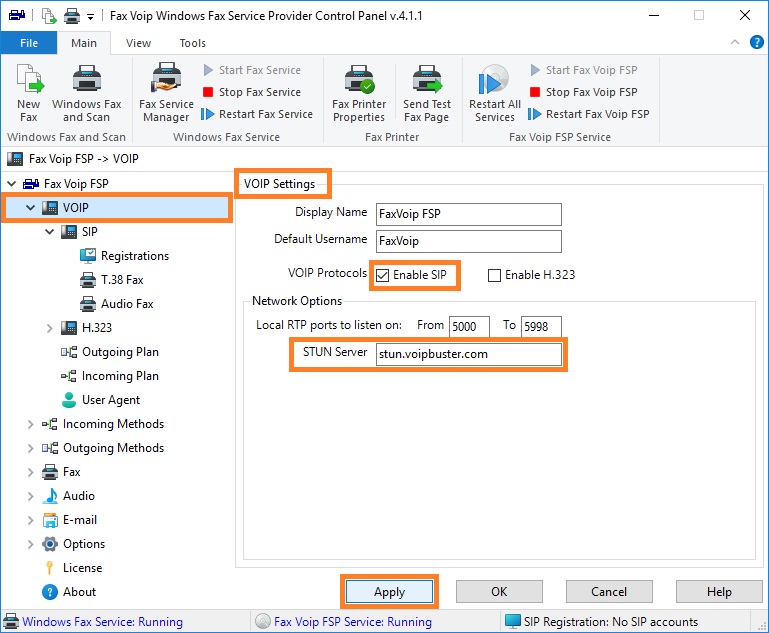
2. Check Enable SIP option.
3. (Optional) In the STUN Server box enter STUN Server name, if necessary for correct operation or recommended by your SIP provider. (Examples: 'stun.voipbuster.com', 'stun01.sipphone.com', 'stun.yourstunserver.com:3478',...).
4. Click <Apply> button.
5. In the Fax Voip FSP Control Panel click VOIP in TreeView, and then click SIP.
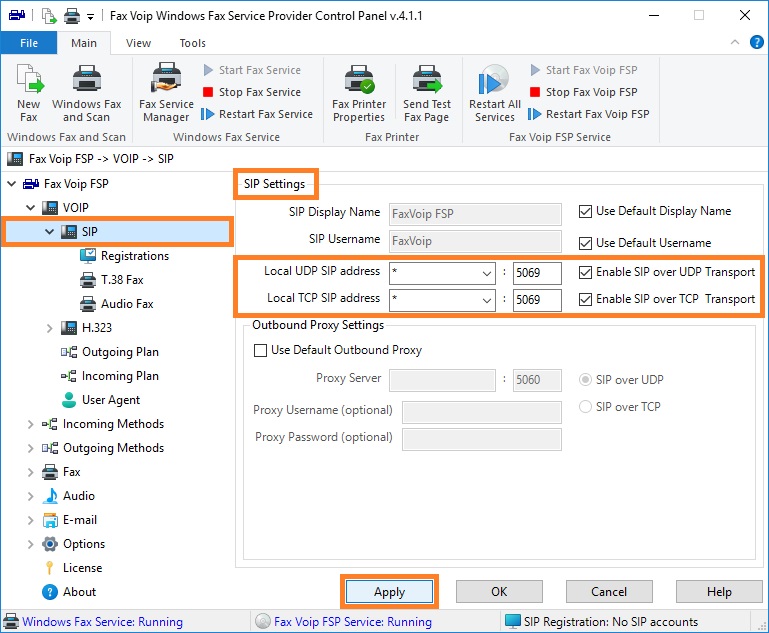
6. In the Local UDP SIP address and Local TCP SIP address fields select or enter network interfaces addresses to listen for SIP requests via UDP and TCP. In the port fields, enter port numbers. ' * ' is all network interfaces and can be recommended for using at least for the first time. When selecting the port number you should understand that the selected port is not used by another SIP program installed on your computer. Fax Voip FSP uses port 5069 for UDP and TCP by default. If you don’t plan to use SIP over TCP, you can uncheck Enable SIP over TCP Transport option.
7. Click <Apply> button.
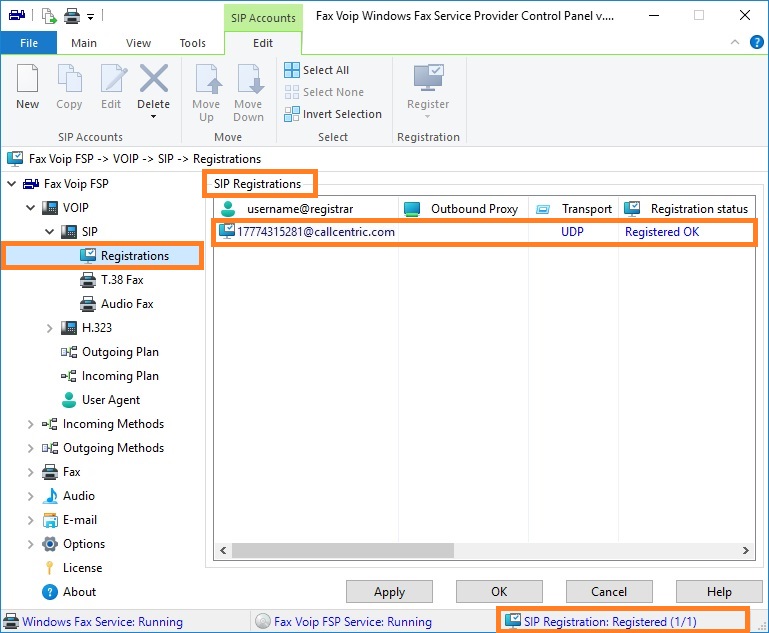
8. In the Fax Voip FSP Control Panel click VOIP in TreeView, then click SIP, then click Registrations.
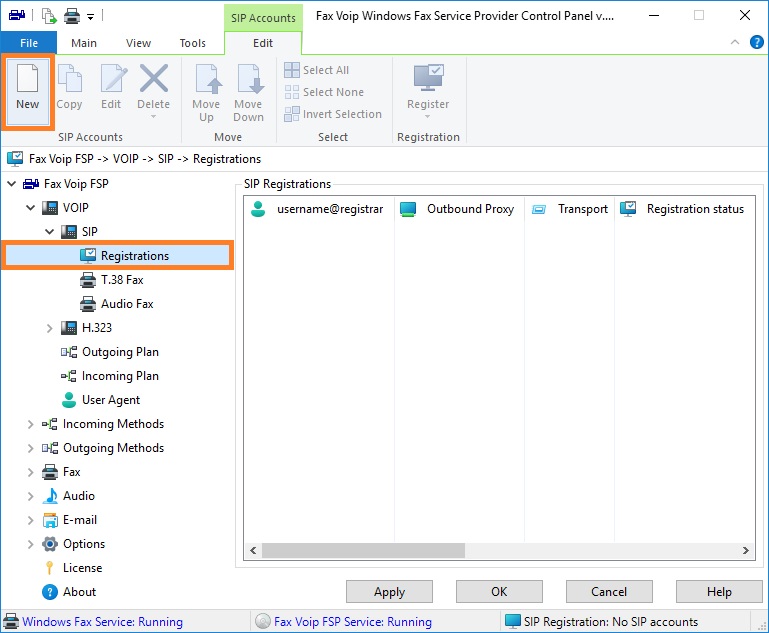
9. To create new SIP Registration entry click New.
10. In the SIP Registration window, enter your username (SIP-ID) in the Username (or SIP-ID) field. Enter password in the Password field.
.
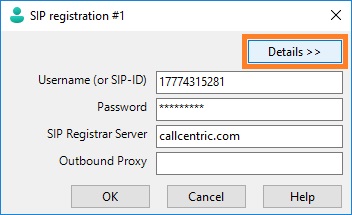
11. In the SIP Registrar Server field, enter the address of the SIP registrar server to be used. Can also contain the port number. If the port number other than 5060 (default), the port number should be specified. (Examples: 'sip.voipbuster.com', 'sip.myserver.com:5064', '192.168.0.5:5068', ...).
12. (Optional) In the Outbound Proxy field, enter the address of the SIP proxy to be used for registration. Can also contain the port number. If the port number other than 5060 (default), the port number should be specified. (Examples: 'sip.myproxy.com', 'proxyserver.com:5080', '192.168.0.5:5065', ...).
13. (Optional) Click <Details> button.
14. (Optional) Enter Authentication Name, Domain/Realm and SIP Contact URL. Note that these fields are usually not required. Incorrect values in these fields can lead to problems with SIP registration and incoming calls.
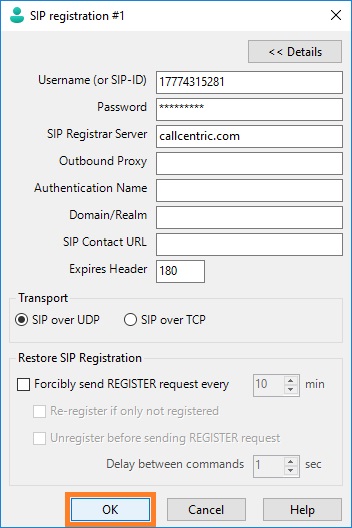
15. In the Expires Header field, change SIP registration timeout (if required). Default value is 180 sec.
16. Select Transport if need. By default SIP over UDP is used. Note that SIP over TCP can be not supported by your server or SIP provider.
17. Click <OK> button to fix changes.
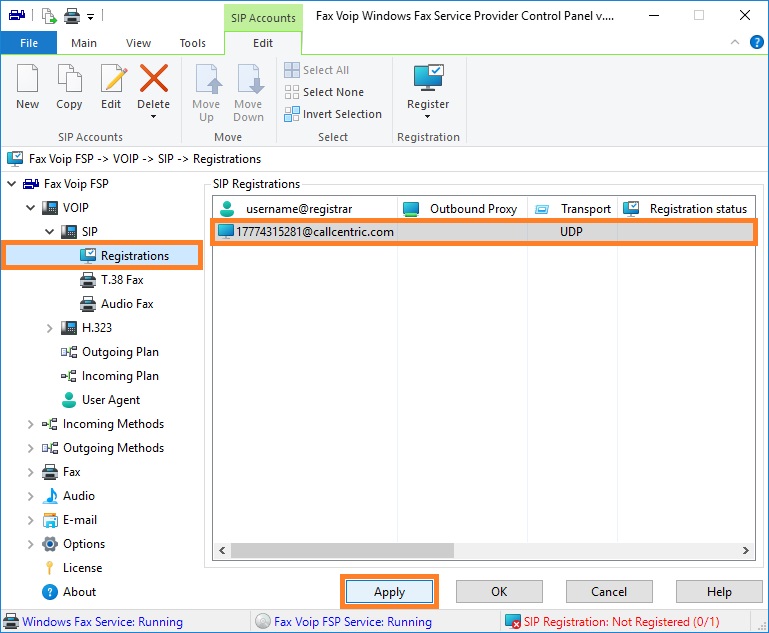
18. The SIP Registration entry will be displayed in the list of SIP Registrations. Click <Apply> button to save modified settings for SIP Registrations.
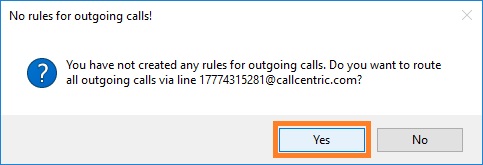
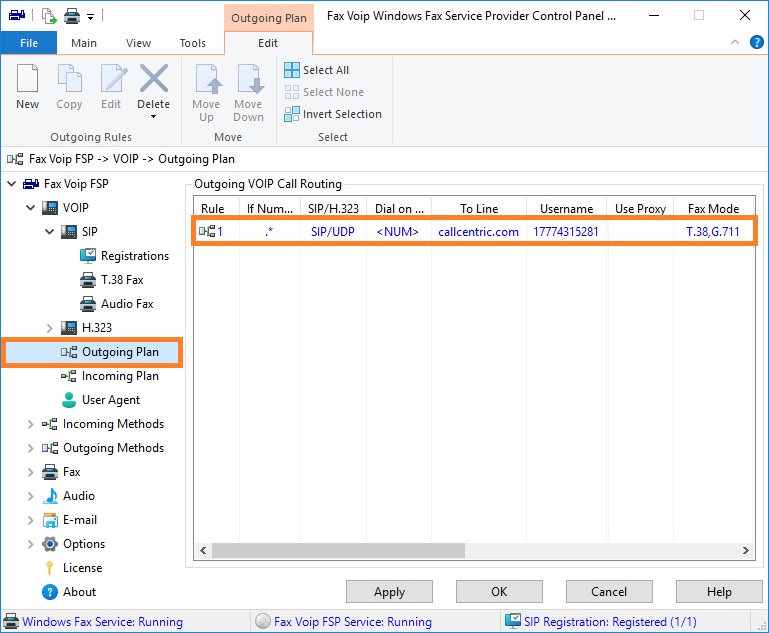
19. You will be prompted to create the rule for outgoing calls. Click <Yes> button to create the default rule.
20. The Outgoing VOIP Call Routing page will be displayed. Default rule means that all Outgoing Calls will be routed through your SIP Registration without number translation with support for both T.38 and G.711 audio fax modes.
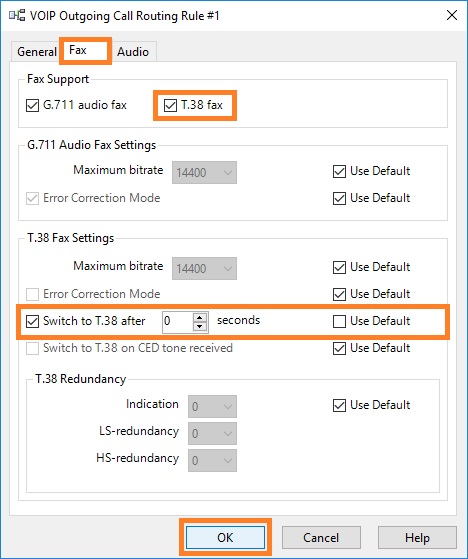
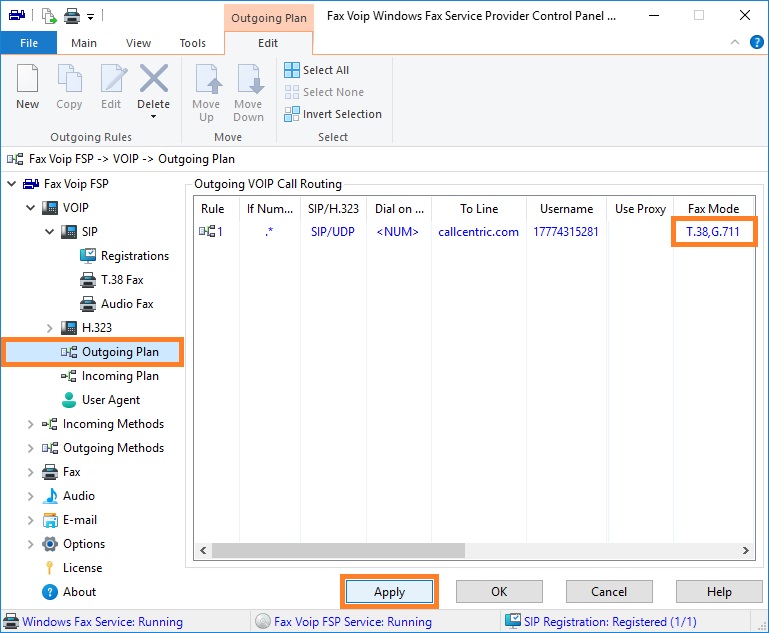
21. (Optional) If your SIP provider supports T.38, in many cases (in particular when working with callcentric.com) you need to force T.38 re-invite when the outgoing call is answered. Double-click the rule. In the Voip Outgoing Call Routing Rule window, on the Fax page, in the Fax Support area, check that T.38 fax option is selected. In the T.38 Fax Settings area, specify Switch to T.38 after 0 seconds. Click <OK>. In the Fax Voip FSP Control Panel click <Apply> button to save modified rules.
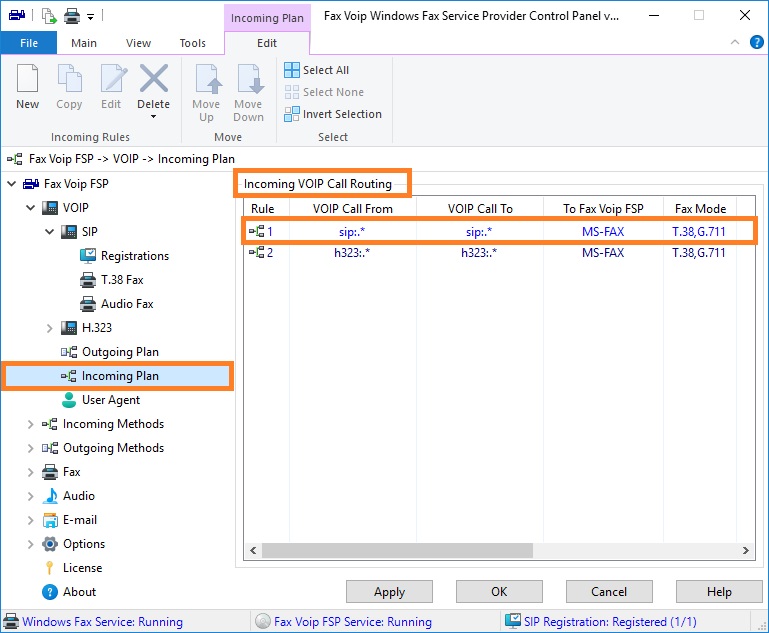
22. In the Fax Voip FSP Control Panel click VOIP in TreeView, then click Incoming Plan. The Incoming VOIP Call Routing page will be displayed. Make sure that you have a rule for incoming SIP calls (default rule is created when you install Fax Voip FSP). Default rule for incoming SIP calls means that all incoming calls from any SIP network will be routed to the Windows Fax Service with T.38 support.
23. The status of SIP Registration is displayed on the SIP Registration page. When properly configured, you should see 'Registered OK'.