To send digitally signed e-mail messages, the valid digital certificate suitable for the specified Sender’s e-mail address must be installed in the certificate store on your system. It is strongly recommended to install certificate into Local Machine Certificate Store to be possible to use it when Fax Voip T.38 Modem is running as a Windows Service. When using this functionality with Route through e-mail Incoming Routing Method (Microsoft Fax), the Network Service account, under which Windows Fax Service is started, should have read access permissions to your certificate private keys. If for some reason you install certificate into Current User Certificate Store, the enhanced protection of the private key should be disabled to be possible to sign outgoing messages in the automatic mode. The Fax Voip T.38 Modem first trying to find the valid email certificate in Local Machine Certificate Store, and only then in the Current User Certificate Store.
To obtain certificate
Digital certificates are issued by independent certification authorities. When you apply for a digital certificate at a certification authority's Web site, your identity is verified before an ID is issued. There are different classes of digital certificates, each certifying to a different level of trustworthiness. For more information, visit the certification authority's Web site.
After obtaining certificate, it is usually installed in the Current User Personal Certificate Store. To access your certificate, follow these steps:
1. Switch to Search pane, type control panel, and then click Control Panel. In the Control Panel click Network and Internet, and then click Internet options.
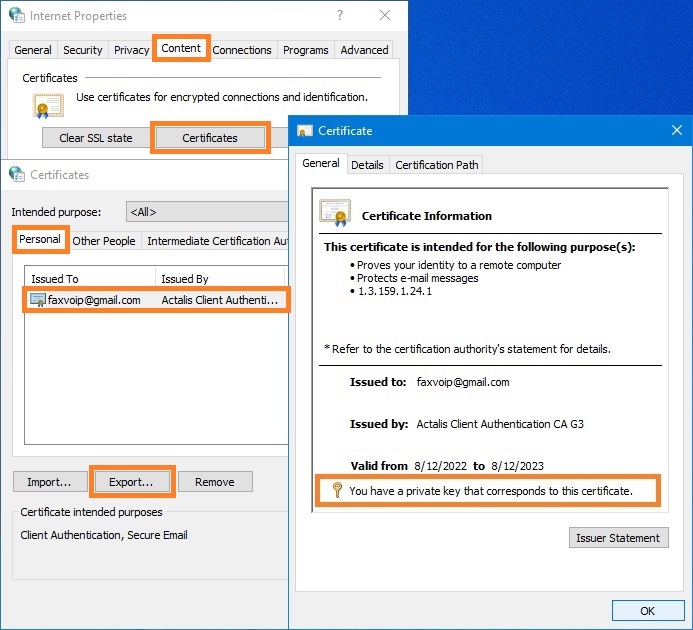
2. In the Internet Properties dialog on the Content page, click Certificates.
3. In the Certificates window select Personal page and then double-click your certificate. Make sure that the information about the presence of the private key is displayed.
Having a valid certificate in the Current User Certificate Store does not provide automatic signing of e-mail messages in the case of running Fax Voip T.38 Modem as a Windows Service. The certificate must be installed into the Local Machine Certificate Store. Moreover, when using this functionality with Route through e-mail Incoming Routing Method (Microsoft Fax), the Network Service account, under which Windows Fax Service is started, should have read access permissions to your certificate private keys. The easiest way is to use the Fax Voip T.38 Modem Control Panel to correctly re-install the certificate.
To re-install your certificate into Local Machine Store using Fax Voip T.38 Modem Control Panel
It is assumed that the valid digital certificate suitable for the specified Sender’s e-mail address, is already installed into the Current User Certificate Store. To install the certificate into the Local Machine Certificate Store, do the following:
1. Open Fax Voip T.38 Modem Control Panel.
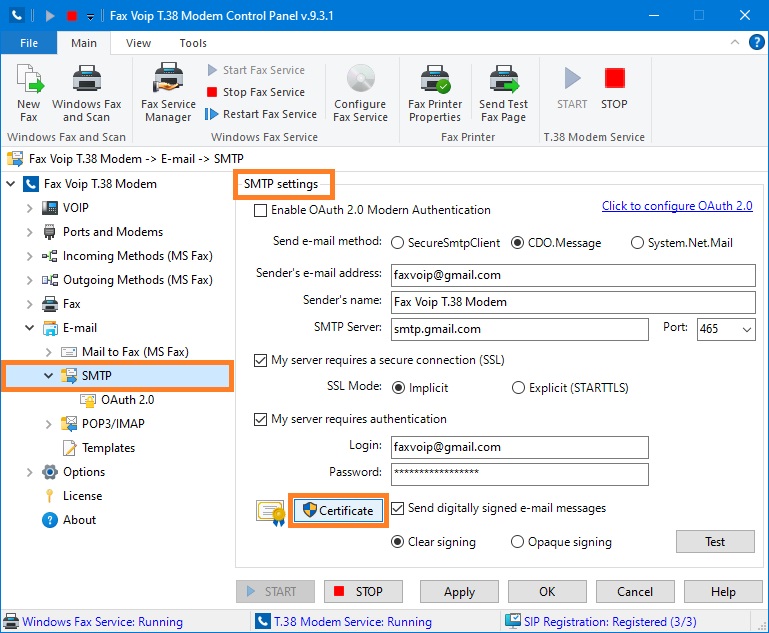
2. Click E-mail in TreeView, then click SMTP.
3. Click <Certificate> button.
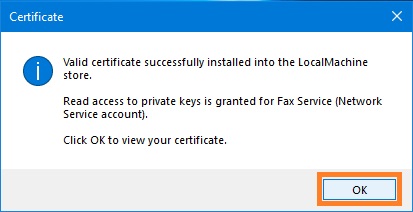
4. ![]() In the dialog box window click Yes to install your certificate into the Local Machine Certificate Store and to grant read access to private keys for fax service (Network Service account). Administrator privileges are required.
In the dialog box window click Yes to install your certificate into the Local Machine Certificate Store and to grant read access to private keys for fax service (Network Service account). Administrator privileges are required.

5. In the next dialog box, click OK.
The subsequent sections show how to manually install the certificate into the Current User Certificate Store (not recommended) or Local Machine Certificate Store. As earlier, it is assumed that the valid digital certificate suitable for the specified Sender’s e-mail address, is already installed into the Current User Certificate Store. You must first export the certificate together with the private key and to store it in the Personal Information Exchange – PKCS #12 (.PFX) file.
To export certificate with private key
1. Switch to Search pane, type control panel, and then click Control Panel. In the Control Panel click Network and Internet, and then click Internet options.
2. In the Internet Properties dialog on the Content page, click Certificates.
3. In the Certificates window select Personal page and then select your certificate. Click Export. Follow Certificate Export Wizard instructions.
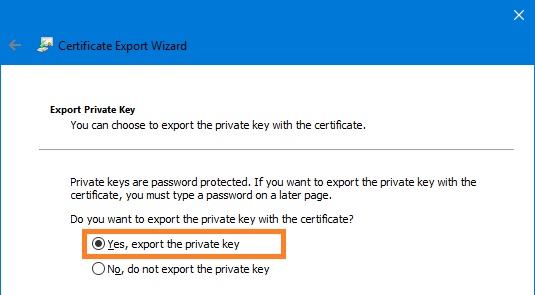
4. On the Export Private Key page, select Yes, export the private key option.
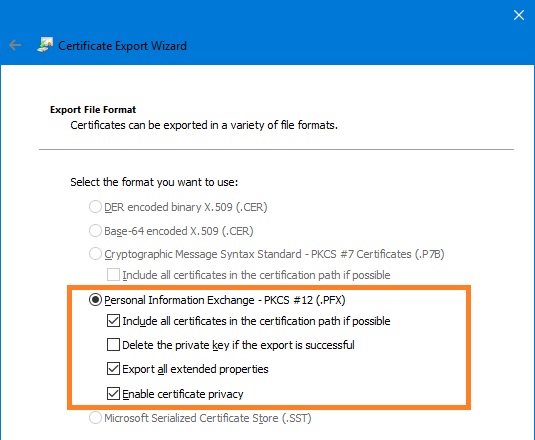
5. On the Export File Format page, select Personal Information Exchange – PKCS #12 (.PFX) option. Select other options, except the option Delete the private key if export is successful as shown in the picture below.
6. On the next page enter password to protect the private key.
7. On the File to Export page specify the name of the file you want to export.

8. On the Completing the Certificate Export Wizard page click Finish to close the wizard.
Upon successful completion of this procedure, you can remove the certificate from Certificate Store if you plan to reinstall it. To do this click Remove in the Certificates window.
To install certificate into Current User Certificate Store (not recommended)
If for some reason you install certificate into Current User Certificate Store, for correct signing of outgoing messages in the automatic mode, the enhanced protection of the private key should be disabled when you install your certificate. In any case, signing will not work in the case of running Fax Voip T.38 Modem as a Windows Service, and also with Route through e-mail Incoming Routing Method (Microsoft Fax).
1. Double-click the .PFX file where your certificate with the private key is saved.
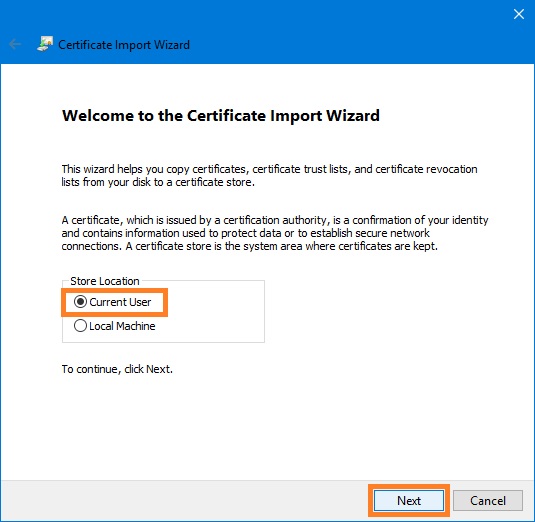
2. In the Certificate Import Wizard, on the first page select Current User option. Click Next and follow instructions.
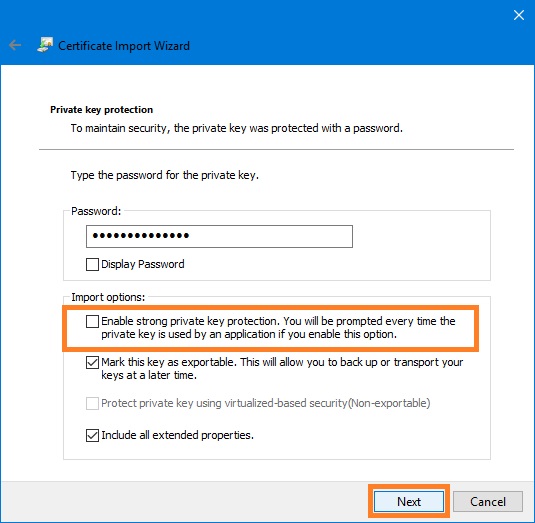
3. On the Private key protection page, in the Import options area uncheck Enable strong private key protection option as shown in the picture below. If you do not do this, Fax Voip T.38 Modem will not be able to automatically sign outgoing messages. Enter password for the private key. You can flag other available options if you want. Click Next.
4. On the Certificate Store page choose Automatically select the certificate store based on the type of certificate option. Click Next.
5. On the Completing the Certificate Import Wizard page click Finish to close the wizard.
To install certificate into Local Machine Certificate Store (recommended)
1. Double-click the .PFX file where your certificate with the private key is saved.
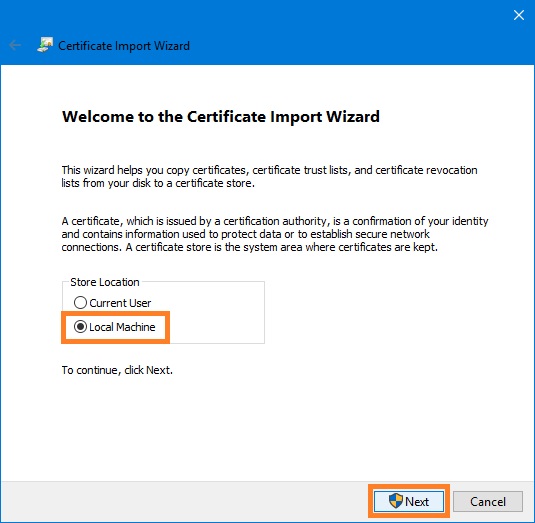
2. ![]() In the Certificate Import Wizard, on the first page select Local Machine option. Click Next and follow instructions. To install certificate into Local Machine Certificate Store, administrator privileges are required.
In the Certificate Import Wizard, on the first page select Local Machine option. Click Next and follow instructions. To install certificate into Local Machine Certificate Store, administrator privileges are required.
3. Follow Certificate Import Wizard instructions.
4. On the Private key protection page, enter password for the private key. You can flag available options in the Import options area if you want. Click Next.
5. On the Certificate Store page choose Automatically select the certificate store based on the type of certificate option. Click Next.
6. On the Completing the Certificate Import Wizard page click Finish to close the wizard.
To access certificates installed into Local Machine Certificate Store
1. Open a Command Prompt window.
2. ![]() Type mmc and press the ENTER key. Note that to view certificates in the local machine store, you must be in the Administrator role.
Type mmc and press the ENTER key. Note that to view certificates in the local machine store, you must be in the Administrator role.
3. On the File menu, click Add/Remove Snap In.
4. In the Add or Remove Snap-ins dialog box, in the Available snap-ins list select Certificates. Click Add.
5. In the Certificates snap-in dialog box, select Computer account and click Next.
6. In the Select Computer dialog box, click Finish.
7. On the Add or Remove Snap-ins dialog box, click OK.
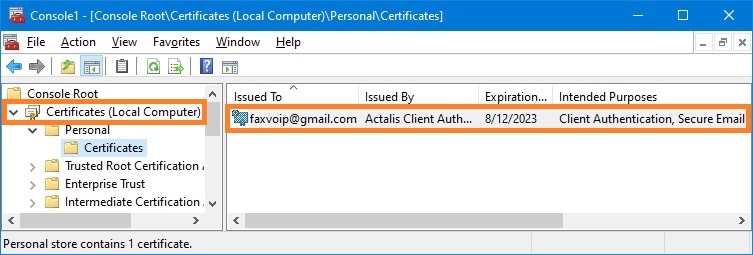
8. In the Console Root window, click Certificates (Local Computer) to view the certificate stores for the computer.
9. (Optional). On the File menu, click Save or Save As. Save the console file for later reuse.
Providing access to certificate private keys for fax service
1. Open the mmc Certificates snap-in, as shown in the previous section.
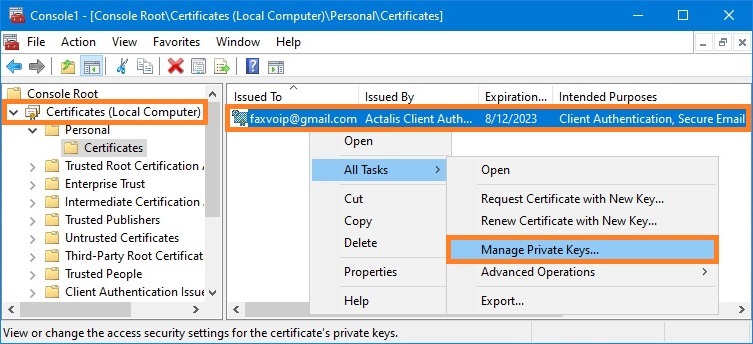
2. Right click your certificate. On the context menu, select All Tasks and then click Manage Private Keys... .
3. In the Permissions for ... private keys window click Add... .
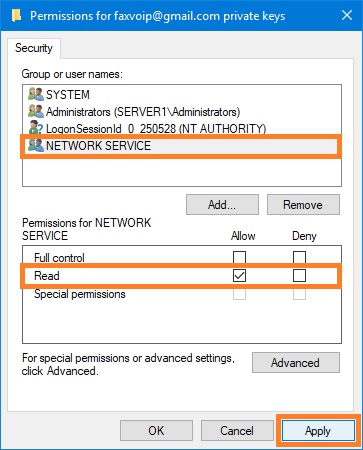
4. In the Select Users or Groups dialog, enter NETWORK SERVICE and then click Check Names. Click OK.
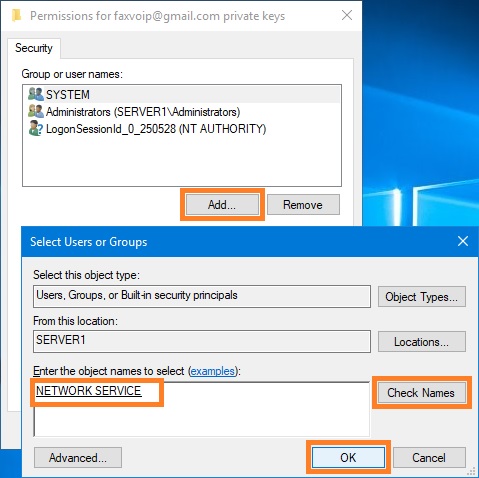
5. In the Permissions for ... private keys window, in the Group or user names list, select NETWORK SERVICE. Grant Read access permissions for Network Service account, as shown in the picture below. Click Apply.
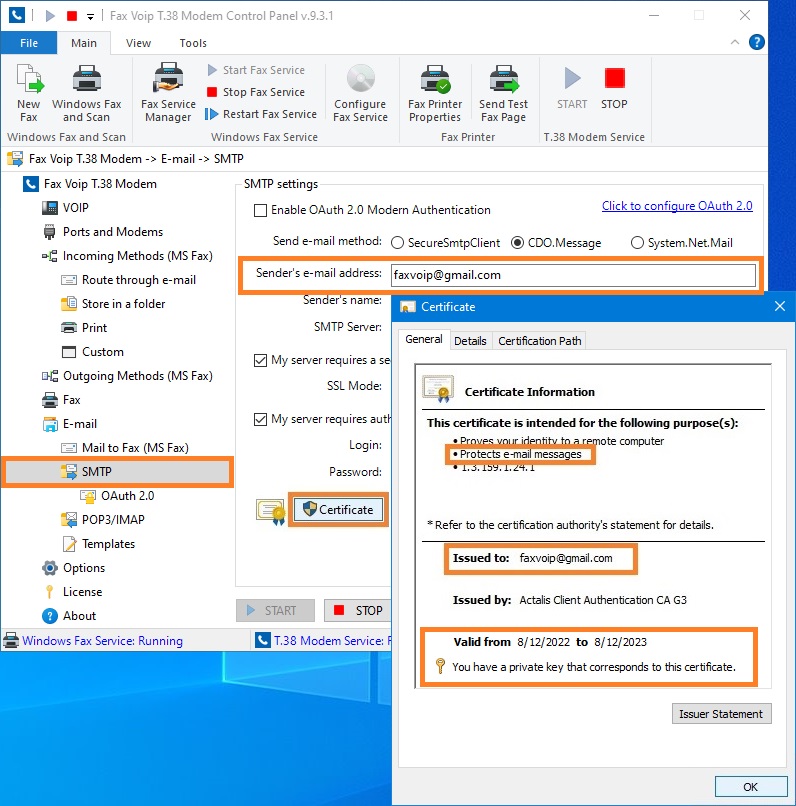
To view certificate in Fax Voip T.38 Modem application
1. Open Fax Voip T.38 Modem Control Panel.
2. Click E-mail in TreeView, then click SMTP.
3. ![]() To view certificate click <Certificate> button. If valid certificate associated with specified Sender’s e-mail address found, it will be displayed. To verify access permissions for Network Service account, administrator privileges are required.
To view certificate click <Certificate> button. If valid certificate associated with specified Sender’s e-mail address found, it will be displayed. To verify access permissions for Network Service account, administrator privileges are required.