When configuring the outgoing H.323 calls from Fax Voip Softphone the following should be taken into account:
To configure Default Display Name do the following:
1. Open Fax Voip SoftPhone Control Panel.
2. Click VOIP in the tree.
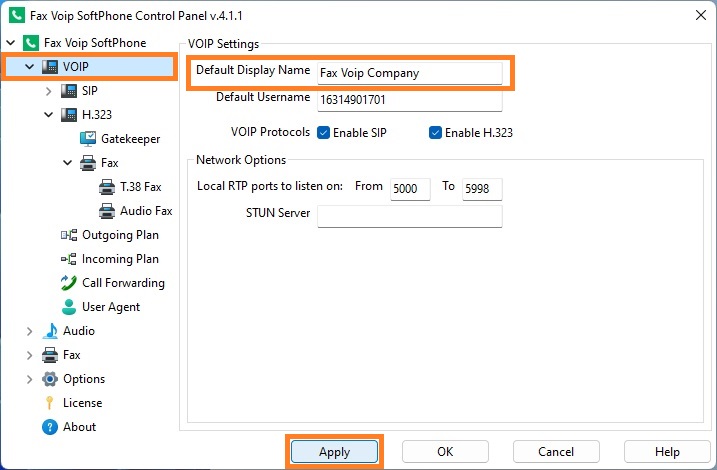
3. In the Default Display Name field enter the Display Name (will be transmitted as Caller ID Name).
4. Click <Apply> button to save modified settings. All the changes are applied immediately.
The Default Display Name can be overridden by the H.323 Display Name.
To specify the H.323 Display Name different from the Default Display Name do the following:
1. Open Fax Voip SoftPhone Control Panel.
2. Click VOIP in the tree, and then click H.323.
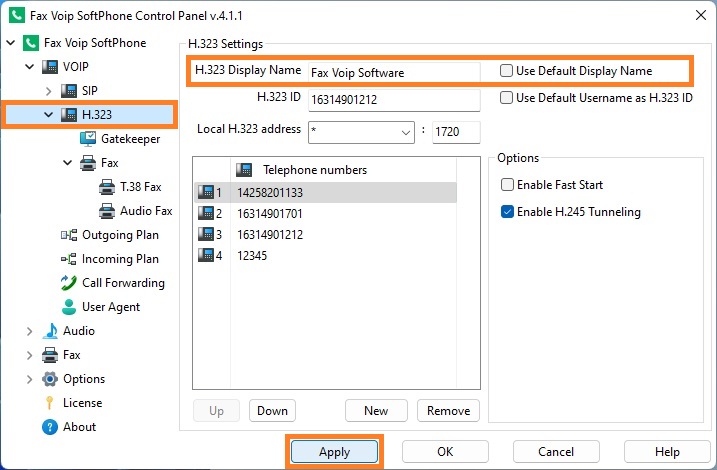
3. Uncheck Use Default Display Name option.
4. In the H.323 Display Name field enter the Display Name (will be transmitted as Caller ID Name).
5. Click <Apply> button to save modified settings. All the changes are applied immediately.
As for the list of H.323 Telephone numbers, you should understand the following:
To add a new number to the Telephone numbers list and use it as default Caller ID Number, do the following:
1. Open Fax Voip SoftPhone Control Panel.
2. Click VOIP in the tree, and then click H.323.
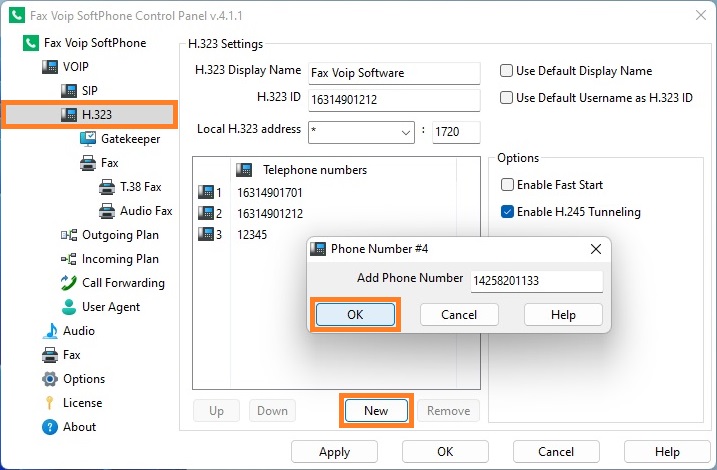
3. To add new phone number click <New> button.
4. In the Phone Number window enter the desired phone number and click <OK>.
5. Use the <Up> button to move the entered phone number to the top of the Telephone numbers list.
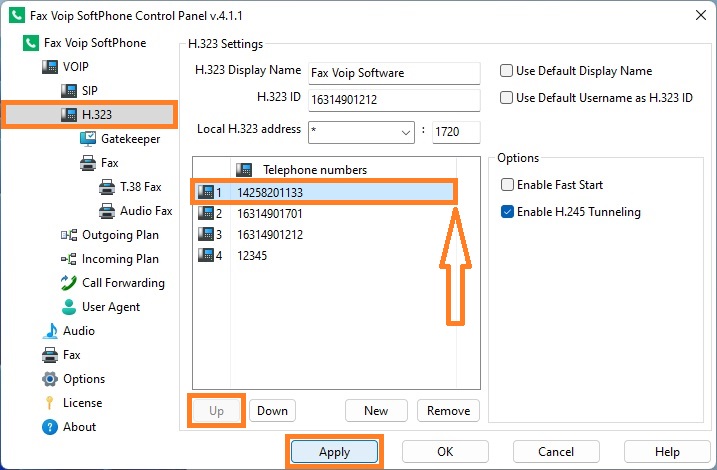
6. Click <Apply> button to save modified settings. All the changes are applied immediately.
The default Caller ID Number and default Caller ID Name (H.323 Display Name) can be overridden by the Outgoing Call Routing settings.
To override Caller ID Number and Caller ID Name in the Outgoing Call Routing rule do the following:
1. Open Fax Voip SoftPhone Control Panel.
2. Click VOIP in the tree, and then click Outgoing Plan.
3. To edit an existing rule select it and click <Edit> button (or double-click the selected rule).
4. In the VOIP Outgoing Call Routing Rule window, on the General page, in the Username field enter your phone number (will be transmitted as Caller ID Number). The Use Default option should be unchecked to be possible to change Username.
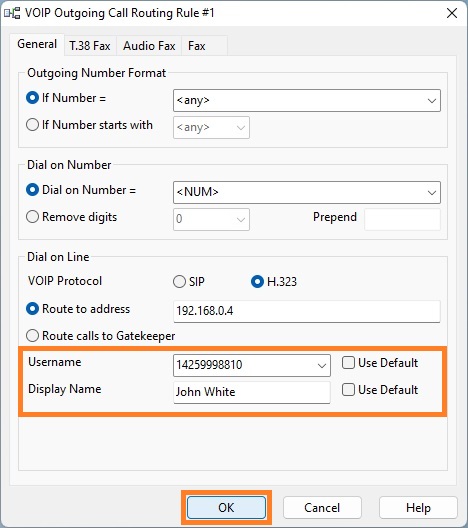
5. In the Display Name field enter the Display Name (will be transmitted as Caller ID Name). The Use Default option should be unchecked to be possible to change Display Name.
6. Click <OK> button to fix changes.
7. Click <Apply> button to save modified settings for Outgoing VOIP Call Routing. All the changes are applied immediately.
Notes