To configure sending of color faxes, do the following:
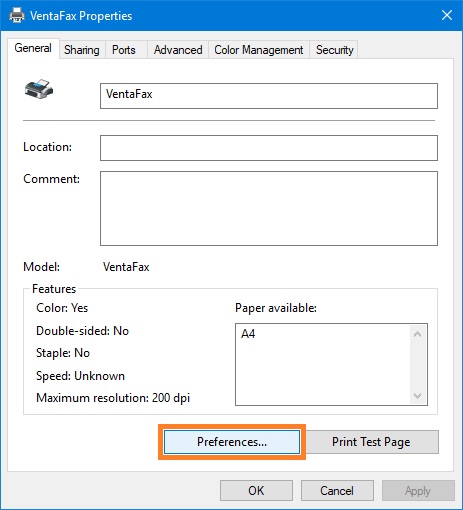
1. Switch to Search pane, type control panel, and then click Control Panel. In the Control Panel, under Hardware, click View devices and printers, and then click Printers & scanners. In the list of printers click VentaFax, and then click Printer Properties.
2. In the VentaFax Properties window, on the General page click Preferences.
3. In the VentaFax Printing Preferences window, on the Paper/Quality page, in the Color area select Color option, and then click Apply.
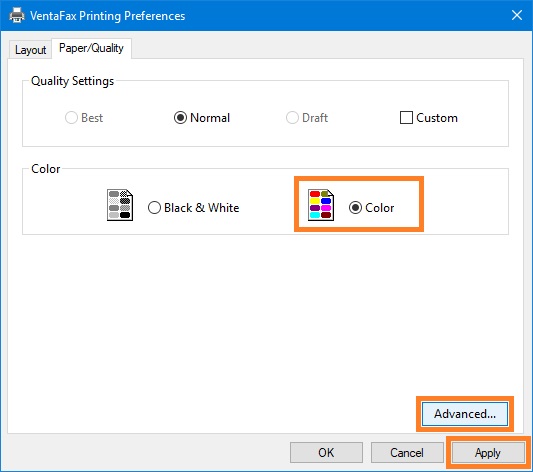
4. Click Advanced button to view VentaFax Advanced Options.
5. In the VentaFax Advanced Options window, select Print Quality: 200x200 dots per inch. Color faxes are always sent and received in Fine Resolution (204*196 dpi).

6. Select Color Printing Mode: True Color (24bpp).
7. Select Compression for color tiff: LZW (recommended). LZW method provides compression with no reduction in quality. This is particularly important if the color fax you create will be sent to different fax machines and if it is not known in advance whether they work in color mode or only in black-and-white mode. The highest quality of black-and-white faxes is achieved when the original color fax has been generated without reduction in quality.
8. Click OK to return to the VentaFax Printing Preferences window.
9. In the VentaFax Printing Preferences window, click Apply, and then click OK.
10. In the VentaFax Properties window, click OK.
11. In the Venta Fax main window, on the toolbar click Settings.
12. In the Program settings window, click Fax in the TreeView, and then click Format.
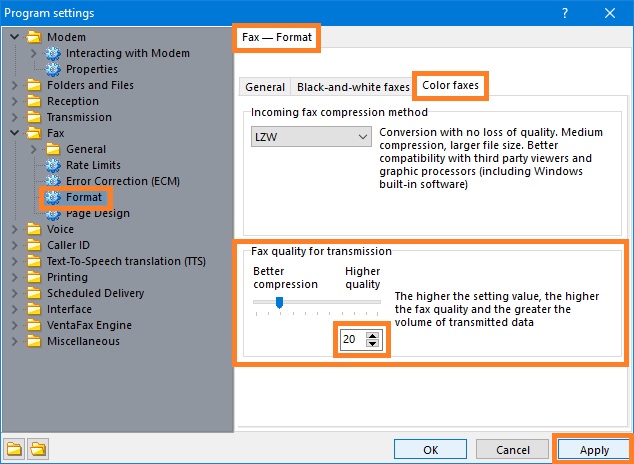
13. On the Fax - Format page, click Color Faxes.
14. In the Color Faxes panel, in the Fax quality for transmission area specify the desired value of Fax Quality. Do not use too high quality, because it greatly increases the volume of data transmitted and hence the time of fax transmission. Using of poor quality leads to strong distortion of transmitted images, and also can not be recommended. According to our observations, using the Quality=20 gives a small transmission time (about 3 minutes for photos at rate of 14400) while maintaining the normal image quality, so can be recommended.
15. Click Apply to save settings.
Notes